SpriteKit の Texture Atlas を使用すれば、驚くほど簡単にアニメーションを作成することができます。
今回は Texture Atlas でアニメーションを実装する手順と注意点を説明したいと思います。
Texture Atlas を使用しアニメーションを表示する
概要
- Texture Atlas フォルダの準備
- アニメーション画像の準備
- フォルダを Xcode プロジェクトにコピー
- プロジェクトの設定
- コードの記述
手順の詳細
-
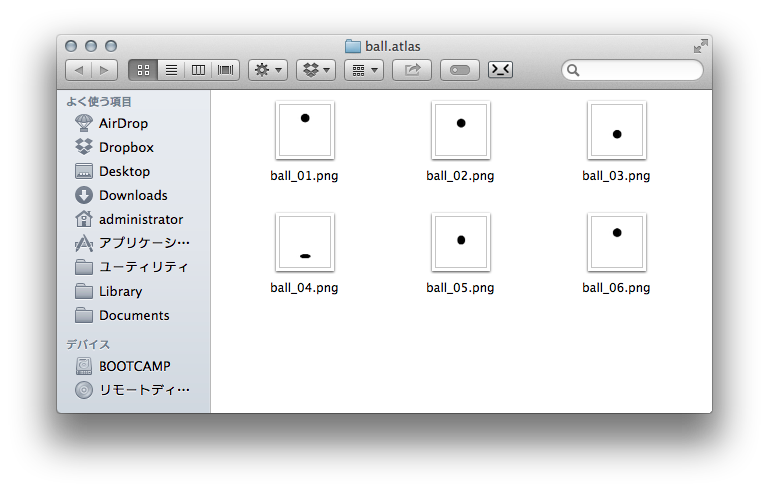
Texture Atlas のフォルダを Finder 上で新規作成します。フォルダ名の末尾は必ず .atlas にします。ここでは ball.atlas としました。
-
Photoshop等で画像を作成します。ボールがバウンドする画像を作成し ball.atlas フォルダ内に書き出します。画像ファイル名は任意のもので結構です。
-
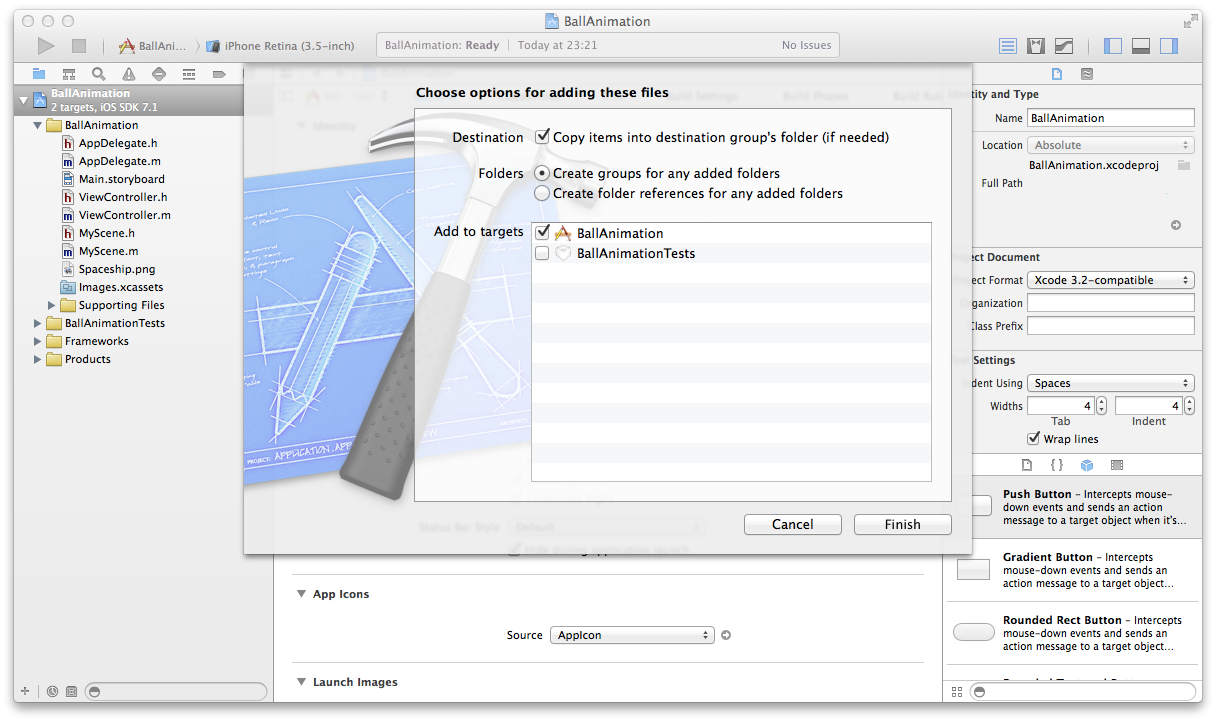
Texture Atlas のフォルダをドラッグし、Xcode のプロジェクトに追加します。
Destination の Copy items… にチェック、Create Groups… を選択し、Add to targets をチェック し Finish をクリックします。
-
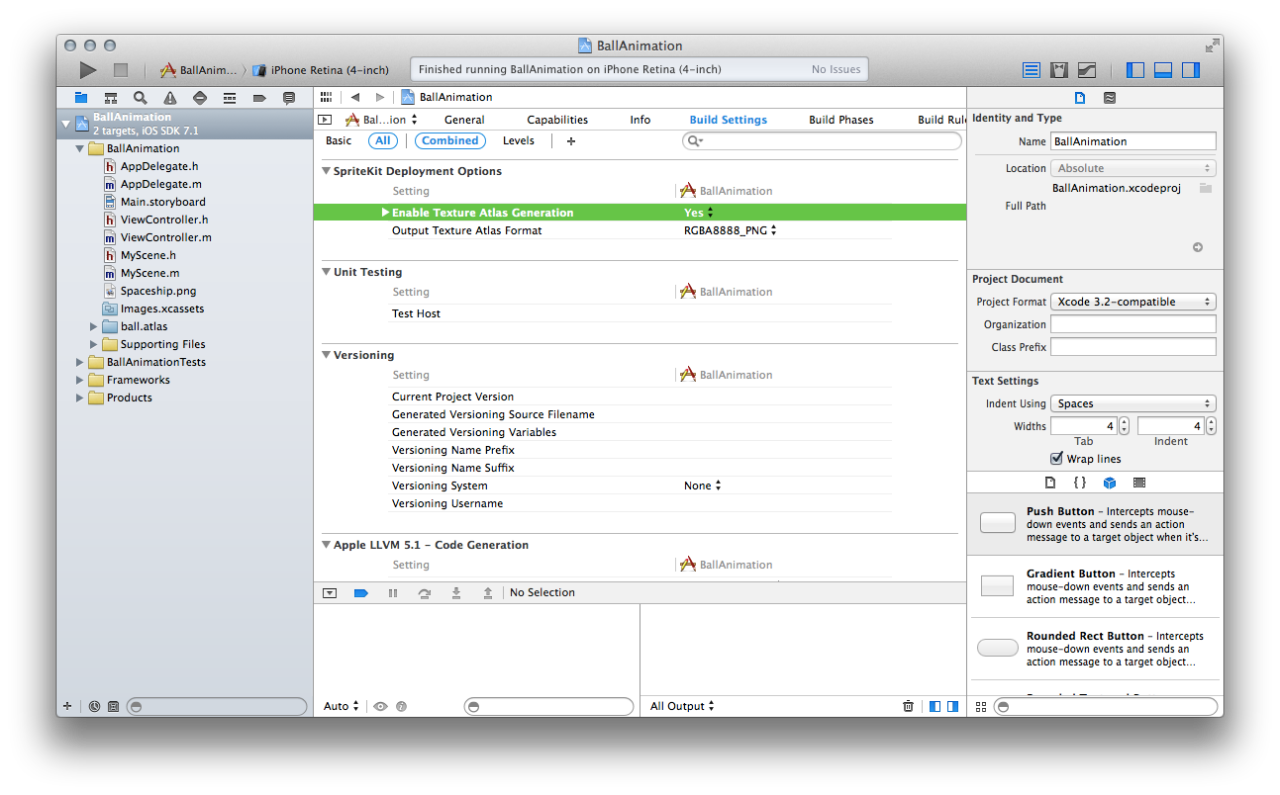
SpriteKit のプロジェクト新規作成(※)し、プロジェクトの設定の BuildSettings から、SpriteKit Deployment Target > Enable Texture Atlas Generation を Yes にします。先に Texture Atlas のフォルダをプロジェクトに追加しておかないと Enable Texture Atlas Generation 項目は表示されません。
※プロジェクトファイルが置かれているパスに日本語が入っていると Texture Atlas が表示されないので注意。
-
タッチした場所でボールアニメーションが実行されるように、touchesBegan デリゲートに以下のコードを記述します。
[code]
-(void)touchesBegan:(NSSet *)touches withEvent:(UIEvent *)event {// Texture Atlas を作成しテスクチャを定義
SKTextureAtlas *atlas = [SKTextureAtlas atlasNamed:@”ball”];
SKTexture *ball01 = [atlas textureNamed:@”ball_01″];
SKTexture *ball02 = [atlas textureNamed:@”ball_02″];
SKTexture *ball03 = [atlas textureNamed:@”ball_03″];
SKTexture *ball04 = [atlas textureNamed:@”ball_04″];
SKTexture *ball05 = [atlas textureNamed:@”ball_05″];
SKTexture *ball06 = [atlas textureNamed:@”ball_06″];// キャラクターをSceneに配置
SKSpriteNode *ball = [SKSpriteNode spriteNodeWithTexture:ball01];
ball.position = [touches.anyObject locationInNode:self];
[self addChild:ball];// アクションを定義しアニメーションを実行
SKAction *bound =
[SKAction animateWithTextures:@[ball01,ball02,ball03,ball04,ball05,ball06]
timePerFrame:0.1];
SKAction *boundForever = [SKAction repeatActionForever:bound];
[ball runAction:boundForever];
}
[/code] -
ビルドして画面をタッチするとアニメーションが実行されます。とても簡単です。
まとめ
Sprite Kit は楽しいですね。Swift の学習と並行しながら Sprite Kit で遊んでみようと思います。
この記事がみなさんのお役に立ちましたら、下記「Share it」よりブックマークやSNSで共有していただければ幸いです。


